p-touch label maker instructions
Discover how to master your Brother P-Touch label maker with easy-to-follow guides. From setup to advanced customization, learn to create professional labels effortlessly and explore troubleshooting tips.
Overview of the P-Touch Label Maker
The Brother P-Touch label maker is a versatile and practical tool designed for creating high-quality, custom labels. Available in over 70 models, from handheld devices to desktop systems, it caters to various needs; The label maker supports multiple tape widths (6mm, 9mm, 12mm) and offers features like frames, symbols, and font customization. Brother’s official manuals and guides provide detailed instructions for setup, operation, and troubleshooting. With its durability and ease of use, the P-Touch system is ideal for offices, factories, labs, and homes, ensuring professional results for any labeling task.
Importance of Proper Setup and Usage
Proper setup and usage of the P-Touch label maker are essential for optimal performance and longevity. Correct tape insertion and alignment prevent jams, while using genuine Brother TZ tapes ensures compatibility and quality. Misuse can lead to misprinted labels or device damage. Regular maintenance, such as cleaning and replacing tapes, is vital for sustained functionality. Always refer to the user manual for safety precautions and guidelines. Proper handling ensures efficient label creation and extends the device’s lifespan, making it a reliable tool for professional and personal use.

Preparing Your P-Touch Label Maker for Use
Start by inserting the tape cassette and installing batteries or connecting power. Ensure proper alignment and use genuine Brother TZ tapes for optimal performance and compatibility.
Inserting the Tape Cassette
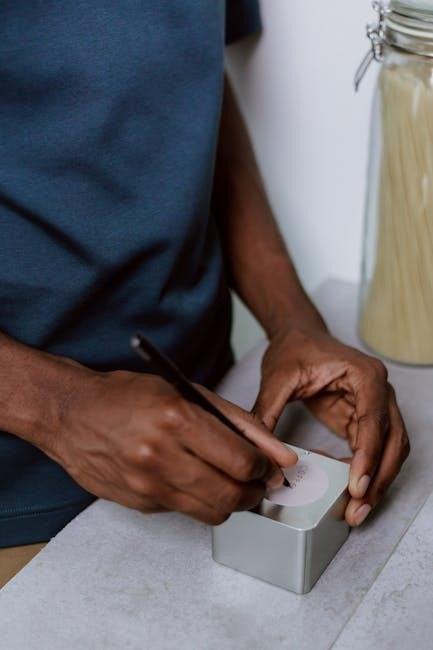
To insert the tape cassette, open the compartment by lifting or sliding the cover, depending on your model. Align the cassette with the guides inside, ensuring the tape protrudes correctly. Gently push the cassette until it clicks into place. Close the compartment securely to ensure proper feeding. Always use genuine Brother TZ or TZe tapes for compatibility and optimal performance. Avoid pulling the tape excessively, as this could cause jams. Proper alignment and correct tape selection are crucial for smooth operation and high-quality labels.
Installing Batteries or Connecting Power
To power your P-Touch label maker, install 4-6 AAA batteries (depending on the model) by opening the battery compartment, usually located on the back or bottom. Align the batteries correctly, ensuring polarity matches the diagram. For models with a power adapter option, connect the AC cable to the device and plug it into a power outlet; Some models may require charging before use. Always use genuine Brother accessories for reliability. If using batteries, avoid mixing old and new ones for consistent performance. Ensure the power indicator lights up to confirm the device is ready for operation.
Basic Operations of the P-Touch Label Maker
Turn on the device, input text using the keypad, and preview labels on the display. Use navigation buttons to edit, format, and print labels with ease and precision.
Turning On the Device and Initial Setup
Start by ensuring the tape cassette is properly inserted and batteries are installed or the device is connected to power. Press and hold the power button until the display lights up. Allow the device to complete its startup process, which may include a brief self-test. Once ready, use the navigation keys to select your preferred language and settings. Ensure the tape feeds correctly and the cutter is aligned. If using a desktop model, connect it to your computer via USB for advanced functionality. Proper initial setup ensures smooth operation for all labeling tasks. Follow on-screen prompts for any additional configurations.
Navigation and Basic Label Creation
Begin by familiarizing yourself with the QWERTY keyboard for text input. Use the arrow keys to navigate through menus and options. Type your label text, then preview it on the display. Adjust font size, style, or alignment if needed using the function keys. Once satisfied, press the print button to create your label. For multiple labels, use the repeat print option. To save a label for future use, select the save option and assign it a name. Ensure the tape is fed correctly before printing to avoid waste. These steps ensure quick and efficient label creation tailored to your needs.

Advanced Features and Customization
Turn off the device, carefully open the tape compartment, and gently remove jammed tape. Clean the area, reload the tape, and restart printing. Use genuine Brother TZ tapes for optimal performance to minimize jams. Always refer to your specific model’s manual for detailed instructions if issues persist.
Using Frames, Symbols, and Special Characters
Enhance your labels by incorporating frames, symbols, and special characters. Access these features through the label maker’s menu, selecting from various frame designs and character options. Use the navigation keys to browse and choose your preferred style. Combine symbols with text for a professional look. Experiment with different combinations to create unique, eye-catching labels. Ensure compatibility by using genuine Brother TZ tapes for optimal printing results. This feature allows you to add creativity and professionalism to your labels, making them stand out in any setting. Explore all design possibilities to customize your labels effortlessly.
Adjusting Font Sizes and Styles
Easily customize your labels by adjusting font sizes and styles using the P-Touch label maker. Access the menu to select from various font sizes, ensuring text is legible. Choose bold, italic, or underline options to emphasize key information. Some models offer multiple font styles, allowing you to match labels to specific needs. Use the navigation keys to scroll through options and confirm your selection. This feature enhances label readability and professionalism. Experiment with different settings to find the perfect balance for your labels. Proper font adjustments ensure your text stands out clearly, making your labels more effective and visually appealing.
Troubleshooting Common Issues
Resolve issues with your P-Touch label maker by identifying common problems like tape jams or blank labels. Refer to the manual for step-by-step solutions to ensure optimal performance.
Resolving Tape Jam Issues
Experiencing a tape jam in your P-Touch label maker? Follow these steps to resolve it. First, turn off the device to ensure safety. Gently open the tape compartment and carefully remove any tangled or loose tape. Avoid pulling the tape forcefully, as this could damage the internal mechanism. Once cleared, reload the tape cassette, ensuring it’s properly aligned with the guide. If the issue persists, refer to your user manual for specific troubleshooting procedures. Proper care can prevent future jams and maintain your label maker’s efficiency.
Fixing Blank or Misprinted Labels
If your P-Touch label maker is producing blank or misprinted labels, check the tape cassette alignment and ensure it’s properly seated. Clean the print head with a soft cloth to remove dirt or debris. Verify that the tape isn’t expired or damaged and that the correct tape type is used. Adjust the print quality settings if necessary. If labels are fading, replace the tape cassette. For persistent issues, reset the device by turning it off, waiting a few seconds, and turning it back on. Consult the user manual for advanced troubleshooting steps to resolve the problem effectively.

Maintenance and Care Tips
Regularly clean the print head and tape area to ensure optimal performance. Use only Brother TZ tapes for consistent results. Replace worn or damaged parts promptly and store the device in a dry, cool place to maintain functionality and longevity.
Cleaning the Printer and Tape Area
Regular cleaning of your P-Touch label maker is essential for maintaining performance. Turn off the device and remove the tape cassette. Use a soft, dry cloth to wipe the print head and tape area, ensuring no dust or residue remains. For stubborn residue, lightly dampen the cloth with water, but avoid harsh chemicals. Allow the area to dry completely before reinstalling the tape. Clean the printer after each tape change and when residue buildup is visible. This routine prevents jams and ensures crisp, high-quality labels. Always refer to your specific model’s manual for detailed cleaning instructions.
Replacing the Tape Cassette
To replace the tape cassette in your P-Touch label maker, first turn off the device and open the cassette compartment. Gently pull out the used tape cassette and dispose of it properly. Insert a new Brother TZ tape cassette, ensuring the tape is aligned with the guide and the arrow on the cassette points in the correct direction. Close the compartment firmly until it clicks. Turn the device back on and test by printing a small label to ensure proper alignment and adhesion. Always use Brother TZ tapes for optimal performance and quality.